Pinterest
Showing posts with label How To. Show all posts

Thursday, February 6, 2014

Tips for Selling Online: Product Photography Lighting at Home or For The Small Business

All the business gurus and website designers say that top quality photos make all the difference when selling online, but as most of us have learned, its not as easy as it sounds. I wasted a lot of time and money for poor results and want to help you save a little. The results of this article can be seen at www.ruggedmaterial.com


Go from this...
...To this!


When I was first attempting to sell my leather goods I tried a lot of different cheap routes for getting good photos of my gear and nothing worked very well. At first I tried using a good quality canon point-and-shoot camera and household 5000K cool white fluorescent bulbs in $7 utility lamps from Home Depot. My photos either looked washed out or had very harsh shadows no matter how I positioned my lights. Positioning the lights was a nightmare too because I had to build an apparatus that was bulky and got in the shot if I wasn't close enough to the item. Then when I was close enough the items were warped because I was too close.

I turned to youtube and wasted hours and hours watching people make wacky light filters and use cheap desk lamps to get the same results I was getting. And then I went to all the eCommerce sites I had ever sold on: ebay, half.com, amazon.com, etsy and a few others and all their tips were the same. They told you to clean your items, put them in natural light and hold still while you take the photo. That was good info, because all those are important and there really isn't a perfect substitute for natural light but its hard to control natural light or schedule your day around the 20 minutes that the light shines through your window at just the right angle. 

So here is a list of some sure fire tips that will get you on the right path. Remember that this will take some trial and error but I am confident that if you follow these things you will do just fine.


1. Gauge your needs. 
By this I mean that if you are trying to sell one item on ebay it may be good enough to wait for those 20 minutes of perfect light to come through the window. Its important to know how often you will be taking product photos before you set a budget or dedicate tons of time to learning this art form. If you need only a few good shots for a single project your most cost/time effective route may be to take your items to a real photo studio, if they charge $25 for photos and it only takes 30 minutes of your time thats a good deal.

If your going to be taking tons of photos it is well worth it to figure it out.

2.Use the best camera you can get a hold of. 
I'm not telling you to go out and spend $2500 on a new Professional DSLR but I am saying that the better the camera the better your chances are of getting good results. I bought studio lights before I bought a DSLR because I had a family member who was willing to let me borrow his camera. If you can't borrow one there are rental services available in most larger cities.

I use the Canon T5i and it does an amazing job for its $750 price tag. It took a while to save up, but I am 100% sure it has paid for itself in the quality of the photos I take with it directly affecting my sales.

Whatever camera you use, make a point to familiarize yourself with it and be able to control the 'white balance' so that you get accurate color representation. 

3. Real Studio lights make a world of difference. 
If your still reading this your probably not an expert photographer and I want you to know that you don't have to be one to get good photos nor do you need thousands of dollars of complicated equipment. 


This is the Cowboy Studio set I purchased, all set up and ready to go. Notice the film over the light is what softens the shadows.
Softbox Lights are easiest to use and set up and can be as affordable as a $100. If your going to take product photos on a regular basis I highly recommend a set up like mine from Cowboy Studio. I picked this set of 3 lights for $195 on amazon.com here. People have given the set mixed reviews mainly because its cheap (you usually get what you pay for in life) and when they travel with these lights they fall apart. I set them up once, move them to the closet when not in use and move them out and they have performed excellently. 

 Unlike strobes and flashes, Soft Box lamps offer constant soft light as they shine through a thin film which takes the sharp edge off of shadows. This allows you to manipulate and adjust your subject in the exact lighting that the camera will be exposed to. This is also a very good setup for video interviews because of the constant soft light. 
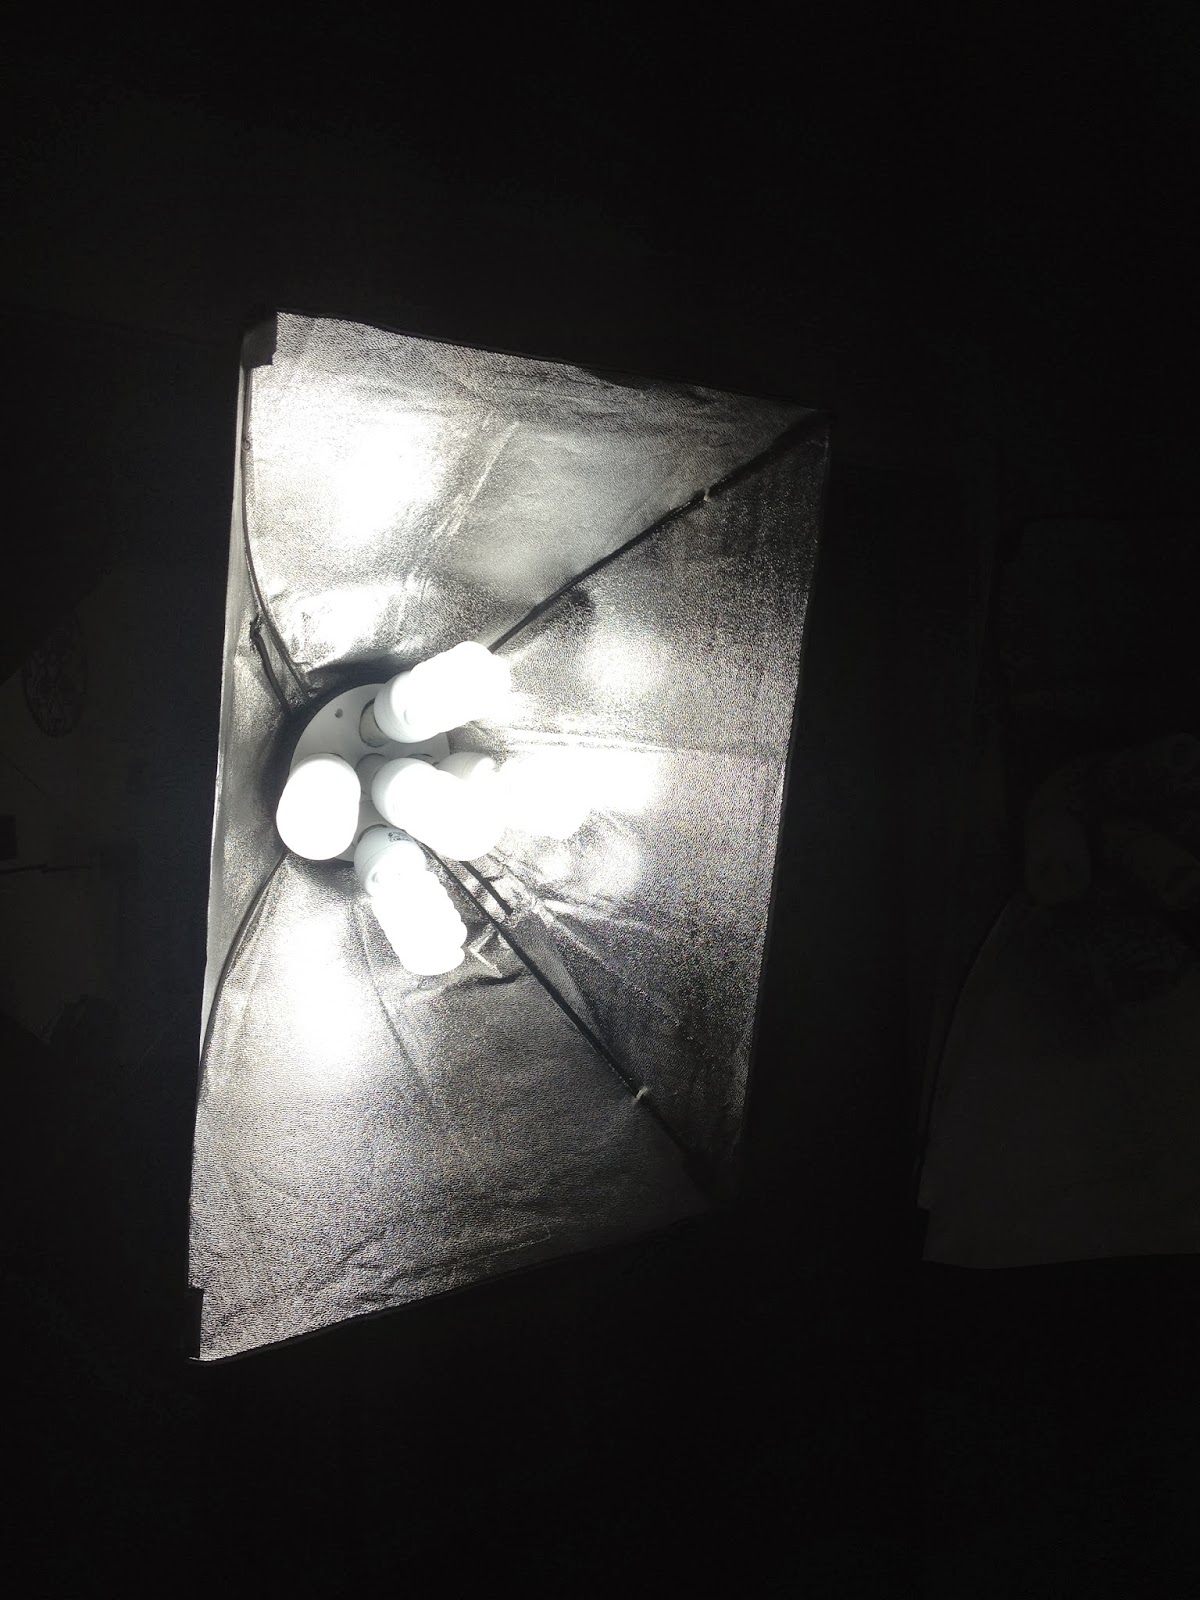

This is one of the Soft Boxes without the filter on the front. Take note that those bulbs are much larger than a household bulb each one is about 8 inches long.

4. Shoot from a distance and try new angles.
You will want to shoot your subject from as far away as you can while still getting a sharp image. The reason is that the closer you are to the image the more distorted the shape will be due to the curve of your lens. Also shoot from many different angles and view the images full size to see what angles work best. Once you find what works try to be consistent from product to product. 


5. Use a light colored background.Any lighter colored background will sell more than a darker version because the lighter feel sets the viewer at ease, makes you look professional and is connoted with High-end products which I'm sure your offering. I use a white background made of 8 pieces of poster-board taped together from the back and tacked to the wall. By draping the paper onto the table it makes the background disappear since there is no harsh corner to view behind the subject.


The 3 light setup is very valuable here because it allows you to control shadows and highlight features as you wish.

This is the raw photo taken from the setup above, on my first day with the new lights.

6. Spend some time correcting the photo before you post it.
The raw photo above looks Ok but with 3 minutes in Photoshop you can correct the colors to make it appear more accurate than you shot it, and clean up the background for that polished look. This is a very easy process if you shoot your photos in front of a white background. Before I made any money I used www.pixlr.com since its a free alternative to Adobe's Photoshop, now I'm a subscriber to Adobe Creative Cloud and I love it. This step is explained countless times on Youtube so I wont get into it here but know that it makes a difference in how professional your offerings look. 

You can see by comparison how much more polished this looks when I clean up the background only.


I hope this has been helpful, it should be enough to get you thinking and introduce you to the process. It is enjoyable once you start to get it!


Tuesday, October 22, 2013

Leather shoe care tutorial. How to remove scratches from leather shoes. How to waterproof leather shoes.

Real Top Grain leather shoes (not crappy Genuine leather) will last a very long time IF cared for properly, that’s a big if. Leather is like our skin, it needs oils and moisture but unlike our skin there is no natural way for leather to get it which requires us to take part in this ten minute process every 6 to 9 months!

The photos shown are in order of the process. These shoes have had a full summer of cabin playing, mountain biking, trailbuilding, welding, and many more abusive activities. They were looking pretty hammered (photo 1) and this process made them new again.(photo 7)

Step 1- Clean the shoes. With good leather you don’t even have to wash the product to get it clean in most cases. Just use a shoe brush to clear all the dirt and dust away, then I used a sponge to clean the side of the sole. (photo 2)


Step 2- Warm the shoes. To help the oils penetrate the leather we must open the pores of the leather with heat.(photo 3) I’ve put 100s of leather products in this very oven and as long as you don’t forget about them and leave your leather in there longer than 10 minutes your shoes will be just fine! Here I did 170 degrees (lowest the oven will go) for about 6 minutes. They were warm but not so hot I couldn’t handle them with my bare hands.

Step 3- Apply the the oils. There are a thousand different products available, most often I use Snow Seal (photo 4) on almost all our leather products. Snow Seal comes in a 7oz. Jar for $5 and if you only use it for shoes, it will last 10 years. It’s mostly Beeswax and other all natural ingredients. It will last longer than creams and liquids that are sold for this purpose.
To apply the oils, take one shoe out of the oven and while its nice and warm, using a piece of cloth rub a generous amount(photo 5) of the wax all over the leather. Take care to get it into all the tight areas because the waxed leather will darken more than the areas that get missed. Once you’ve covered everything immediately take a new clean rag and wipe off any excess wax.

Step 4- Finishing. Repeat step 3 on the second shoe. Once that has been done you may want to take the clean cloth, not the applicator cloth and go over the shoes again to make them shine more. You will see the leather darken a lot while the wax is melting into the leather, but over the next few days it will lighten up somewhat. Also as you work the shoes you will see the scratches disappear. By the time your done your shoes will look new, smell great and be quite water resistant!


Leather shoe care tutorial. Shoes shown here are Vans OTW Native American Pack.
Real Top Grain leather shoes (not crappy Genuine leather) will last a very long time IF cared for properly, that’s a big if. Leather is like our skin, it needs oils and moisture but unlike our skin there is now no natural way for leather to get it which requires us to take part in this ten minute process every 6 to 9 months!
The photos shown are in order of the process. These shoes have had a full summer of cabin playing, mountain biking, trailbuilding, welding, and many more abusive activities. They were looking pretty hammered (photo 1) and this process made them new again.
Step 1- Clean the shoes. With good leather you don’t even have to wash the product to get it clean in most cases. Just use a shoe brush to clear all the dirt and dust away, then I used a sponge to clean the side of the soul. (photo 2)
Step 2- Warm the shoes. To help the oils penetrate the leather we must open the pores of the leather with heat.(photo 3) I’ve put 100s of leather products in this very oven and as long as you don’t forget about them and leave your leather in there longer than 10 minutes your shoes will be just fine! Here I did 170 degrees (lowest the oven will go) for about 6 minutes. They were warm but not so hot I couldn’t handle them with my bare hands.
Step 3- Apply the the oils. There are a thousand different products available, most often I use Snow Seal (photo 4) on almost all our leather products. Snow Seal comes in a 7oz. Jar for $5 and if you only use it for shoes, it will last 10 years. It’s mostly Beeswax and other all natural ingredients. It will last longer than creams and liquids that are sold for this purpose.
To apply the oils, take one shoe out of the oven and while its nice and warm, using a piece of cloth rub a generous amount(photo 5) of the wax all over the leather. Take care to get it into all the tight areas because the waxed leather will darken more than the areas that get missed. Once you’ve covered everything immediately take a new clean rag and wipe off any excess wax.
Step 4- Finishing. Repeat step 3 on the second shoe. Once that has been done you may want to take the clean cloth, not the applicator cloth and go over the shoes again to make them shine more. You will see the leather darken a lot while the wax is melting into the leather, but over the next few days it will lighten up somewhat. Also as you work the shoes you will see the scratches disappear. By the time your done your shoes will look new, smell great and be quite water resistant!
Shoes shown here are Vans OTW Native American Pack.


Thursday, May 30, 2013

How to Recognize the Best Leather Products vs. Cheap ones.

It can be hard to know what leather products are real and which ones are fake or poor quality. Here are a few essential things to help you understand what your buying! 

There are 4 main classes of leather: Full Grain, Top Grain, Genuine and Bonded leather.

Full Grain Leather- Longest lasting, Premium Leather. Its strongest and usually best looking because of the patina it gains over time.

 Top Grain Leather- Lasts a long time but does not "wear in" like Full Grain, usually costs more and is stiff because of treatments

Genuine Leather- is the leftover leather from splitting the premium leathers (see third photo). Its technically still leather but does not last the way that you would hope, it has no grain and tears much easier.

Bonded Leather- is the leather equivalent of particle board. It doesn't last and isn't worth what people try to charge for it.